


This guide covers everything you need to know aboutmacrame plant hangers: the different types of plant hangers and hardware available, how to make your own macrame hanger from scratch, and how to hang it properly so it looks great and stays put. Let's get to it!
What Are Macrame Plant Hangers?

Macrame is the art of knotting cord or rope into decorative patterns. Its roots are in Arabic weaving traditions, and it was incredibly popular in 1970s home decor. Over the past few years, it has made a comeback. Today, macrame is a trendy DIY craft for accessories, including bags and jewelry, and home decor, such as and plant hangers and coasters.
Macrame plant hangers are stylistically versatile because of the different knot-work and rope colors, and they fit homes with rustic, boho, minimalist, and modern aesthetics.
However, even the most beautifully knotted hanger is only as good as what's holding it up. That’s why choosing the right hardware is part of the project process.
What Hardware Holds Up The Planter?
The type of hardware you need for hangingplant hangers depends on your wall or ceiling material, the weight of your plant, and whether you're hanging indoors or outdoors. Here's a breakdown of what's available and when to reach for each option.
Ceiling Hooks

Ceiling mounting is the most popular way to display a macrame plant hanger. It allows the piece to hang freely, sway slightly in a breeze, and drape without wall interference.
-
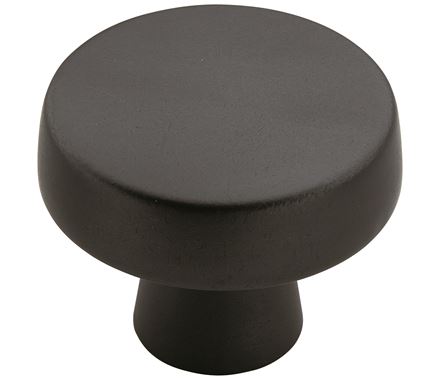
Standard ceiling hooks work for lightweight to mid-weight pots and suit both indoor plant hangers and outdoor plant hangers under a covered porch or pergola. This option tends to be most popular.
-
Long ceiling hooks come into play when you need extra clearance. Think high ceilings, exposed beams, or spaces where a standard hook sits too flush to the surface to easily thread macrame cord through.
-
Modern ceiling J hooks offer a cleaner look, making them a natural fit for modern or Scandinavian-inspired interiors where a bulkier hook would feel out of place.
-
Extension hook kits are a smart addition when you need to adjust drop height after the fact. Instead of reinstalling a new hook, you simply add the extension to what's already there. These are not always necessary, but are useful when you've realized your hanger hangs a few inches too high once the plant is in it.
-
S hookslink the loop at the top of your macrame hanger to a ceiling hook, a chain, or another anchor point, and they can be repositioned without any tools. Use them to make height adjustments quickly or to swap plants between hangers without disturbing the installation.
Important note before you install any ceiling hook: Identify what you're drilling into.
A wood joist can support a standard screw hook with no extras. Drywall without a joist behind it requires a toggle bolt or a rated drywall anchor, especially for heavier pots. Concrete or masonry ceilings need a masonry bit and a masonry anchor. Matching the right fastener to your ceiling type is essentially for keeping your plant and ceiling intact.
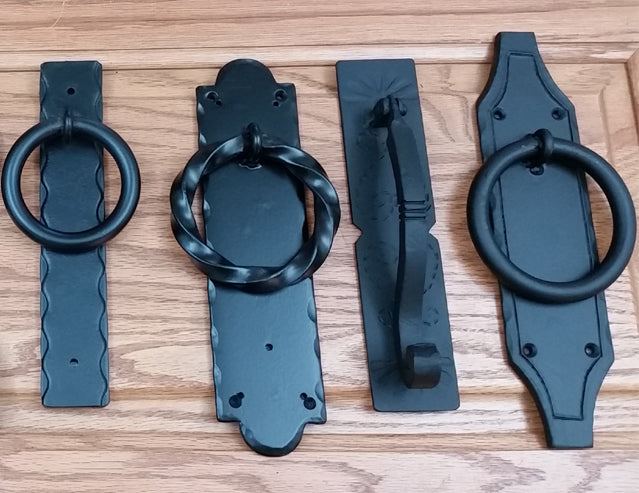
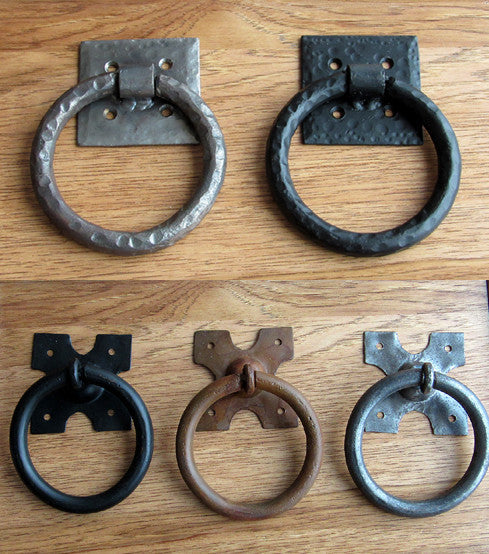
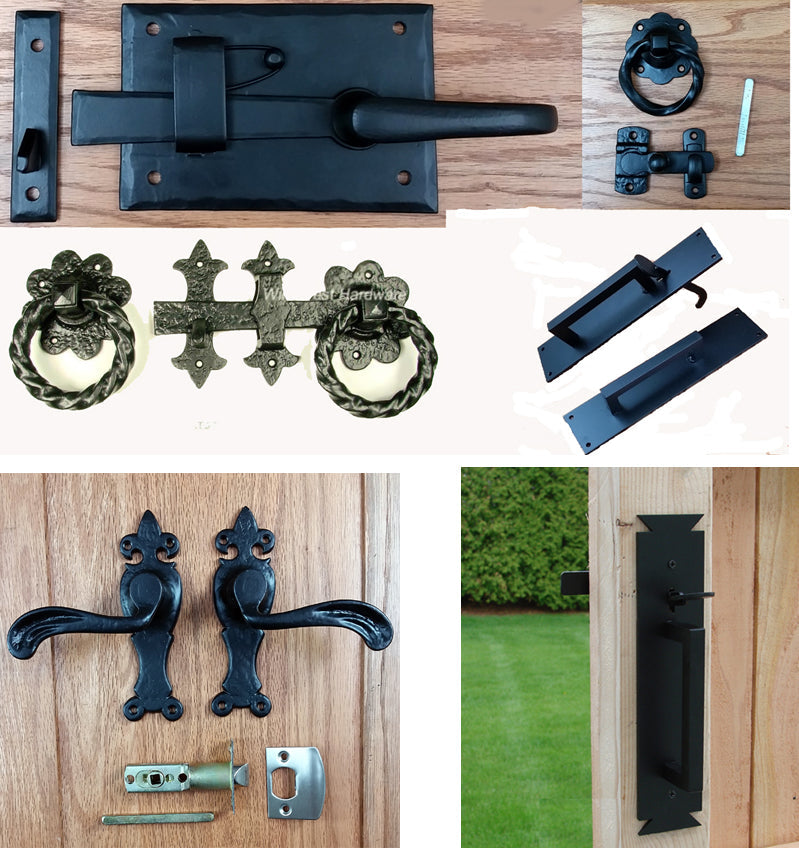
Wall Brackets & Wall Hook Hangers

Wall-mounted hardware is the right call when ceiling mounting isn't practical, such as entryways with no overhead anchor point, exterior brick or siding walls, balconies, or any space where you want the plant to live against a vertical surface.
-
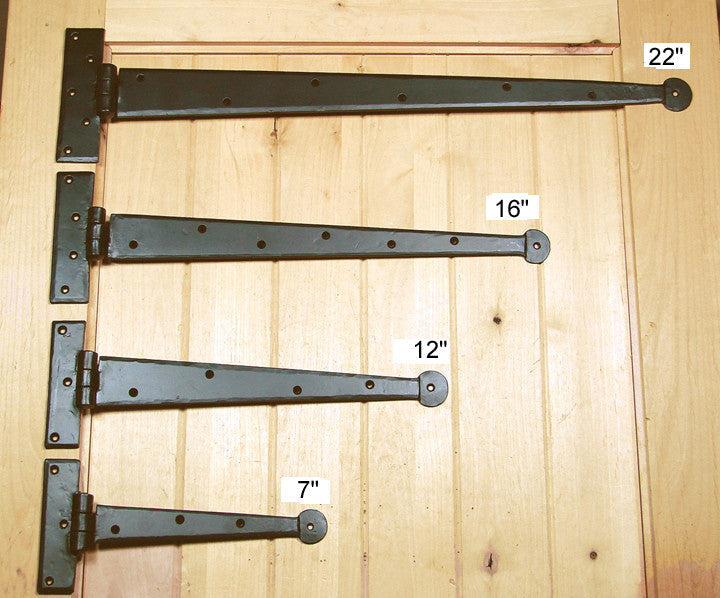
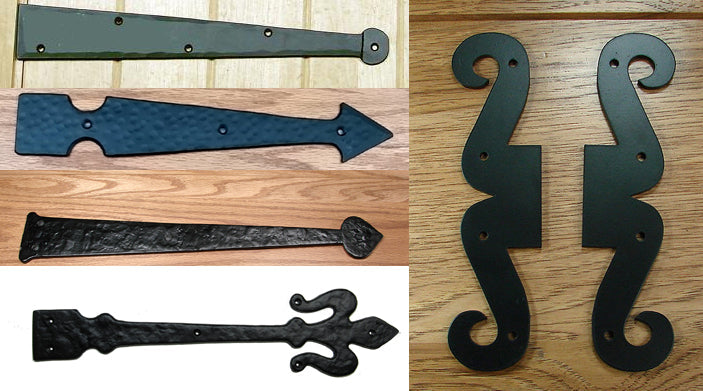
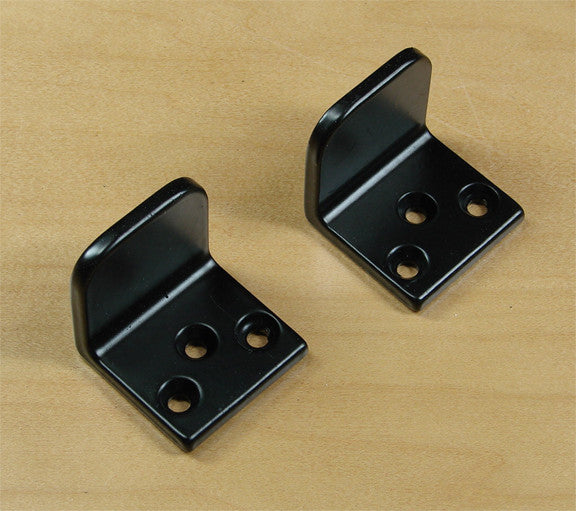
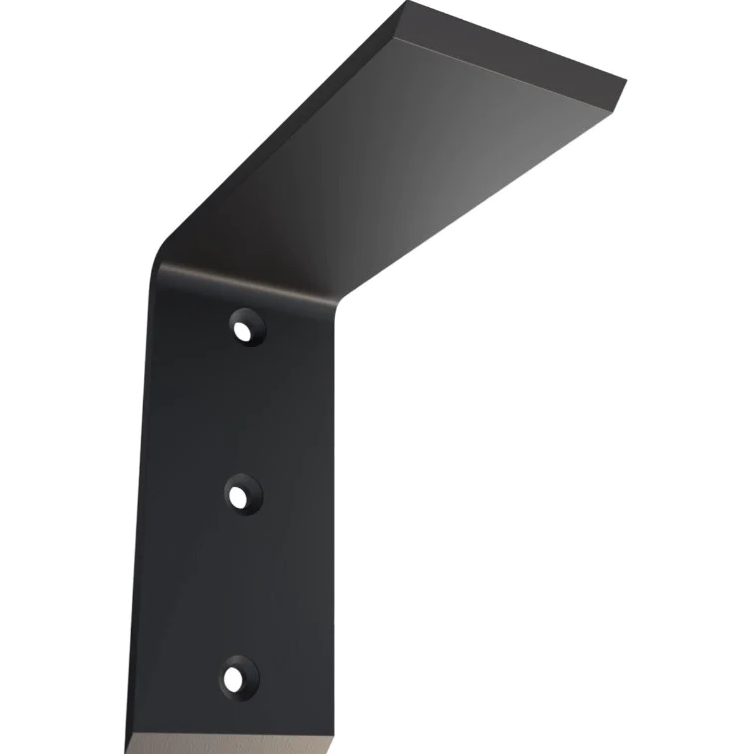
Hanging plant wall brackets (available in both straight and curved designs) extend outward from the wall so the macrame hanger can swing freely without the pot bumping against the surface behind it.
-
Swivel brackets are worth purchasing if your plant has strong light preferences. They rotate to reposition the pot toward the sun, away from harsh afternoon rays, and make plant care easier with changing seasons.
-
Long utility wall hooks are built for heavier pots. The extended reach keeps the plant away from the wall, allowing macrame to hang properly and preventing soil moisture from getting onto painted surfaces.
-
Siding hooks are specifically engineered for vinyl or wood siding. No drilling into wall studs is required, as they grip the siding profile directly. These are one of the most practical options for outdoor plant hangers on the exterior of a home.
-
Vinyl coated outdoor brackets have a weather-resistant finish. The coating protects the metal from rain, humidity, and UV exposure, making them the right choice for any exposed outdoor setup.
-
Plant hanger wall bases anchor directly to the wall and give a stable, flush point to hang from. They work especially well for heavier or multi-strand macrame designs where a single hook might not be stable enough.
Supporting Hardware

-
Flower plant chains bridge the gap between a ceiling hook and the top loop of your macrame hanger. They add visual height, create a layered look, and make it easy to swap plants in and out without disturbing the hook above.
-
Plant hanger hardware kits bundle together the essential mounting components in one package. These are a practical choice for first-time installers.
-
Floral wire can be used to gently secure trailing stems within the hanger's basket or to train a vine to grow in a particular direction without damaging the plant.
How to Make Macrame Plant Hangers

Making your own macrame plant hanger is more approachable than it looks. Once you learn a handful of basic knots, the rest is repetition and patience. Here's what you need and how to get started.
What You'll Need
-
Macrame cord (100% cotton, 3mm–5mm thickness works well for most pots)
-
A wooden ring or dowel to hang from (about 2"–3" diameter)
-
Scissors
-
A measuring tape
-
A hook or stand to hang your work in progress
Basic Macrame Knots to Know
Square knot: Made by crossing two outer cords over a center pair, alternating sides, and pulling tight. A row of square knots creates the structured sections of the hanger.
Spiral (half-square) knot: Like the square knot, but only crossing from one side repeatedly. This creates a natural twist or spiral down the length of the hanger.
Gathering knot: Used to bundle multiple cords together at the top and bottom of the hanger. It's the knot that creates the cinched look just above the pot basket and at the tassel end.
Beginner Tips
-
Match cord thickness to pot weight. Heavier pots need thicker cord (5mm+) or multiple strands.
-
Test your knot tension. Do this with the pot in place before finalizing the gathering knot. Pots can shift the basket shape when loaded.
-
Keep your knots consistent. Uneven tension is the most common beginner mistake, and it shows in the finished product.
Step-by-Step Instructions
-
Cut your cords. For a standard hanger, cut eight lengths of cord at roughly 15–18 feet each. Fold each piece in half and attach all eight folded pieces to your wooden ring using alark's head knot, giving you 16 working strands.
-
Create the neck. Use agathering knot to bundle all 16 strands together just below the ring, leaving a few inches of spacing above the knot for the ring to show.
-
Divide into groups and knot the body. Separate your strands into four groups of four. Work down each group withsquare knots, leaving even spacing between each set. Typically 3"–5" depending on how long you want the finished hanger to be.
-
Form the basket. This is where the groups come together to cradle the pot. Drop down a few inches below your last row of knots, then split the groups and re-pair them, taking two strands from one group and two from an adjacent group, and tie a square knot. Repeat around all four sides. This interlocking row is what creates the pocket that holds your pot.
-
Gather and finish. Bring all strands back together below the basket and secure with a large gathering knot. Trim the ends evenly to create a clean tassel, or leave them at varying lengths for a more relaxed look. Unravel the ends for a fluffy fringe effect.
How to Hang Macrame Plant Hangers

With your hanger knotted and your pot picked out, the final step is getting everything on the wall or ceiling properly. Here's how to do it right.
Ceiling Installation
1. Gather your tools
-
Ceiling hook orJ hook
-
Drill or screwdriver
-
Stud finder or toggle bolt anchors
-
S hook or plant chain for added drop (optional)
2. Find your anchor point
Use a stud finder to locate a ceiling joist.
If there's no joist where you want to hang, use a rated toggle bolt anchor. Check the weight rating against your pot's loaded weight before doing this, as soil and water add up fast. A 10" pot fully watered can easily hit 15–20 lbs.
3. Install the hook
Drill a pilot hole slightly smaller than your hook's threading, then screw in the ceiling hook by hand until it's snug against the ceiling. For J hooks, follow the included hardware.
4. Add a chain or S hook
If you want more drop, attach a flower plant chain or a large S hook between the ceiling hook and the macrame loop. This also makes it easy to remove the plant for watering without fully uninstalling the hanger.
5. Hang and adjust
Loop the macrame ring or top knot over the hook, load the pot, and check that it hangs level. Adjust the gathering knot at the basket if the pot sits crooked.
Wall Bracket Installation
1. Gather your tools
-
Wall bracket
-
Drill
-
Level
-
Screws
-
Stud finder or wall anchors
2. Mark your placement
Hold the bracket against the wall at your desired height and mark the screw holes with a pencil. Eye level or slightly above tends to work well visually.
3. Find studs or set anchors
If a stud aligns with your marks, drill directly into it. If not, install wall anchors rated for your pot's weight before driving in screws.
4. Mount the bracket
Secure the bracket to the wall, checking level before tightening fully.
5. Hang the macrame
Loop the top of the hanger over the bracket arm.
The bracket's extension length should be enough that the pot hangs clear of the wall. If the pot is pressing against the wall, you may need a longer-reach bracket.
Final Words
Whether you're hanging a single macrame hanger in a sunny corner of your living room, building out a full indoor garden across multiple rooms, or setting up planters to greet guests at your front door, we have the hardware to make it happen.
Browse Wild West Hardware’s fullplant hanger collection and find exactly what your setup needs.
FAQs About Macrame Planter Hangers
1. What are some common macrame mistakes?
Some common macrame mistakes include cutting cords too short, using cord too thin for a pot’s weight, and inconsistent knot tension. It’s also common to accidentally use the wrong cord material for outdoor planters. Avoid using cotton or jute, and instead use nylon or polyester.
2. What plants are good for macrame?
Plants that are good for macrame include pothos, spider plants, string of pearls, and burro's tail. Many others also work well, so long as you consider where the hanger will be installed and the plant's specific care needs.


